Getting started as an admin
Your first week as a KSKILL Integra admin comes down to four moves: know the sidebar, create a course, invite a user, and open analytics. This tour walks each one.
Before you start
You need the Admin role. First user on the tenant already has it; anyone else needs to be promoted from the Users page.
Step 1 — Learn the sidebar
The left rail groups every screen into four bands. Overview is your dashboard and calendar. People is Users, Groups, Cohorts, Branches and the Talent Pool. Content is Courses, Learning paths, Skills, Certificates and the Knowledge base. Configuration is Analytics, Automations, Notifications and Settings.
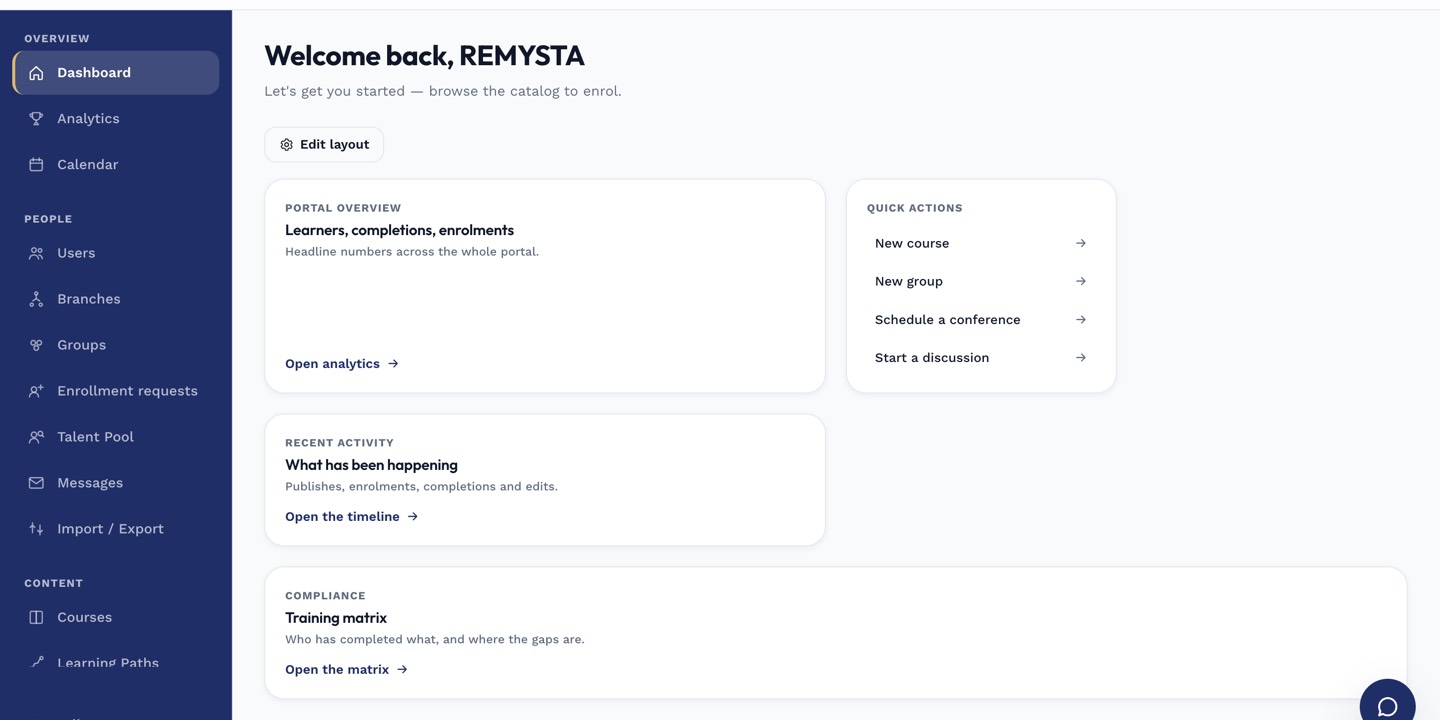
The left rail is the anchor for every admin task; every screen you visit starts with a click here.
Step 2 — Create your first course
Open Content → Courses and click New course. Every course starts life as a draft, so you can rehearse the outline and hide learners until it is ready. Pick Manual when you already have a script, or AI when you want the platform to draft the section titles for you.
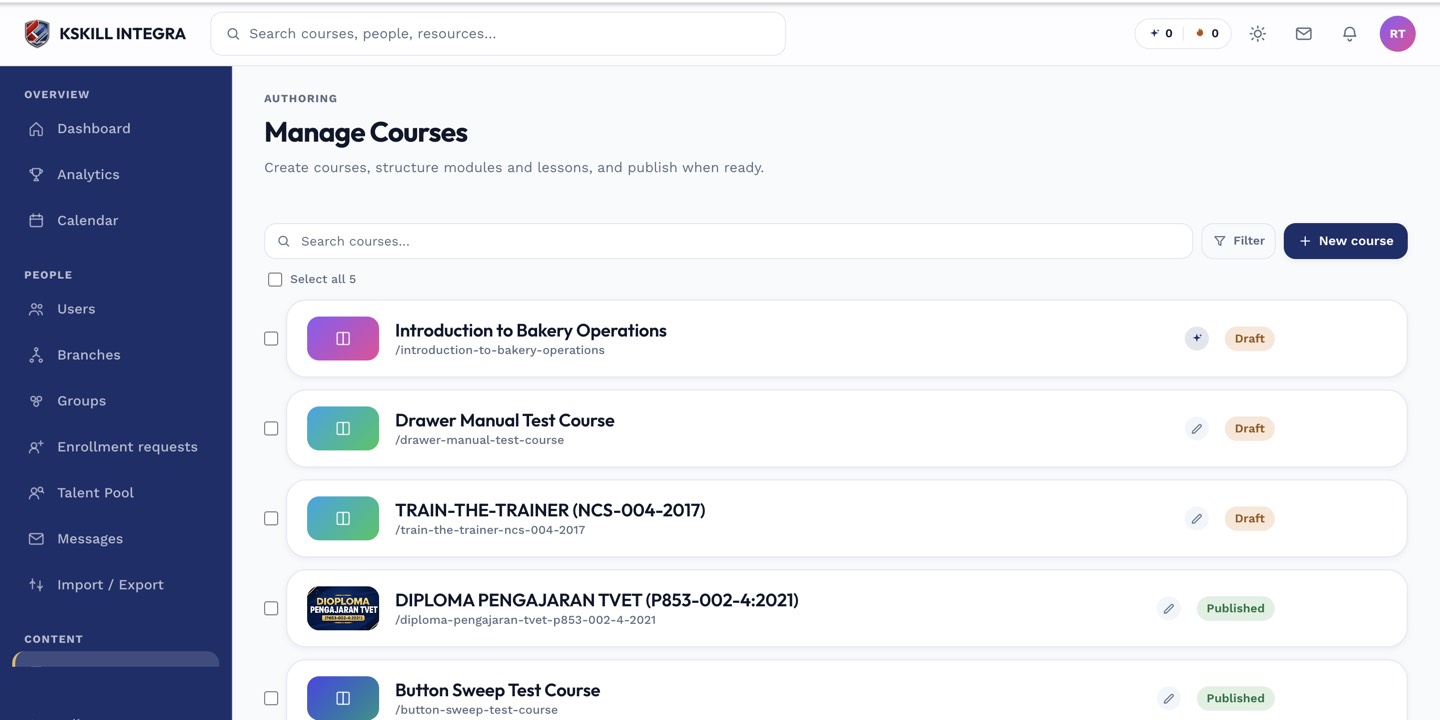
The Manage Courses screen is the launch pad for anything course-related.
Step 3 — Invite the first user
Open People → Users and click Invite. Enter an email, pick a role, and press send. Keycloak emails a set-password link and the user lands on their dashboard already signed in — nothing else to configure.
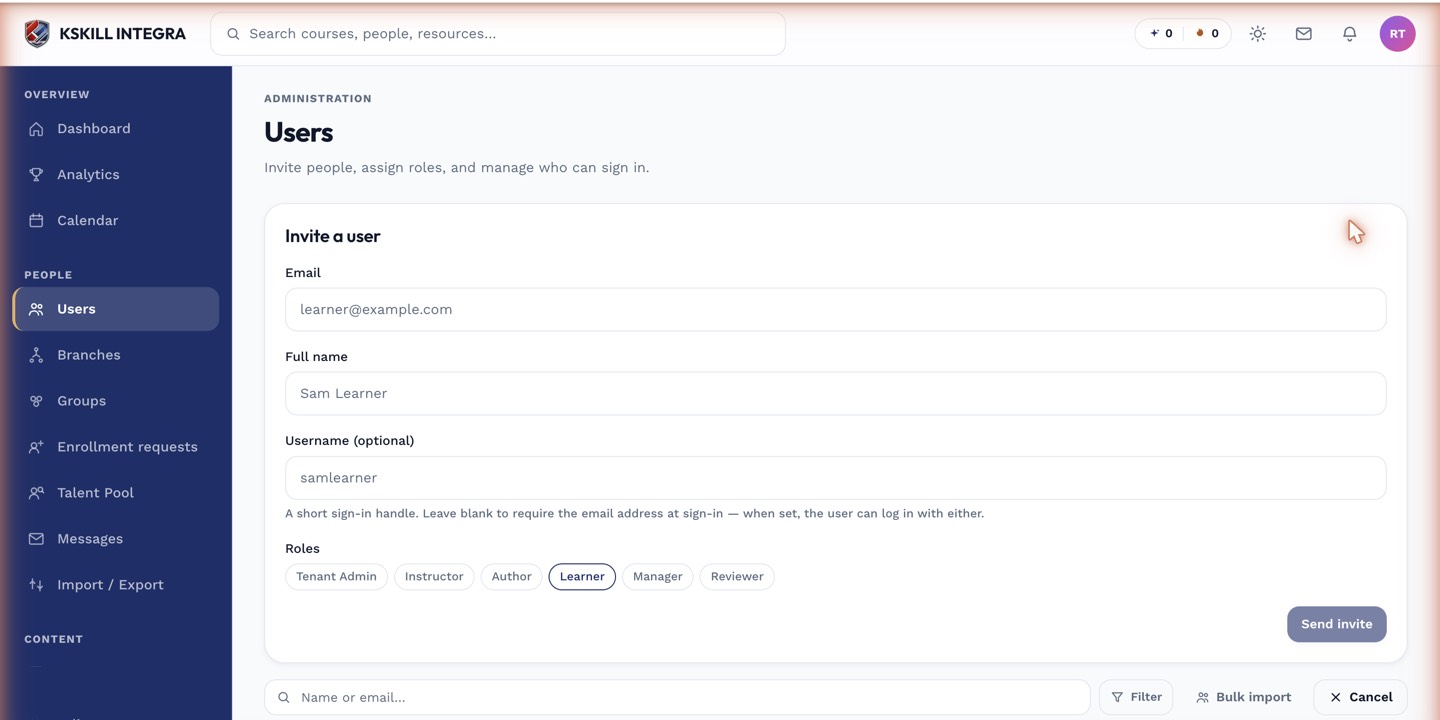
The invite drawer is the same shape whichever role you assign.
Step 4 — Read the analytics
Open Configuration → Analytics. Three KPI tiles cover active learners, completion rate and average score. The deeper tabs answer sharper questions, and Export & schedule can email you a Monday-morning digest without ever signing in.
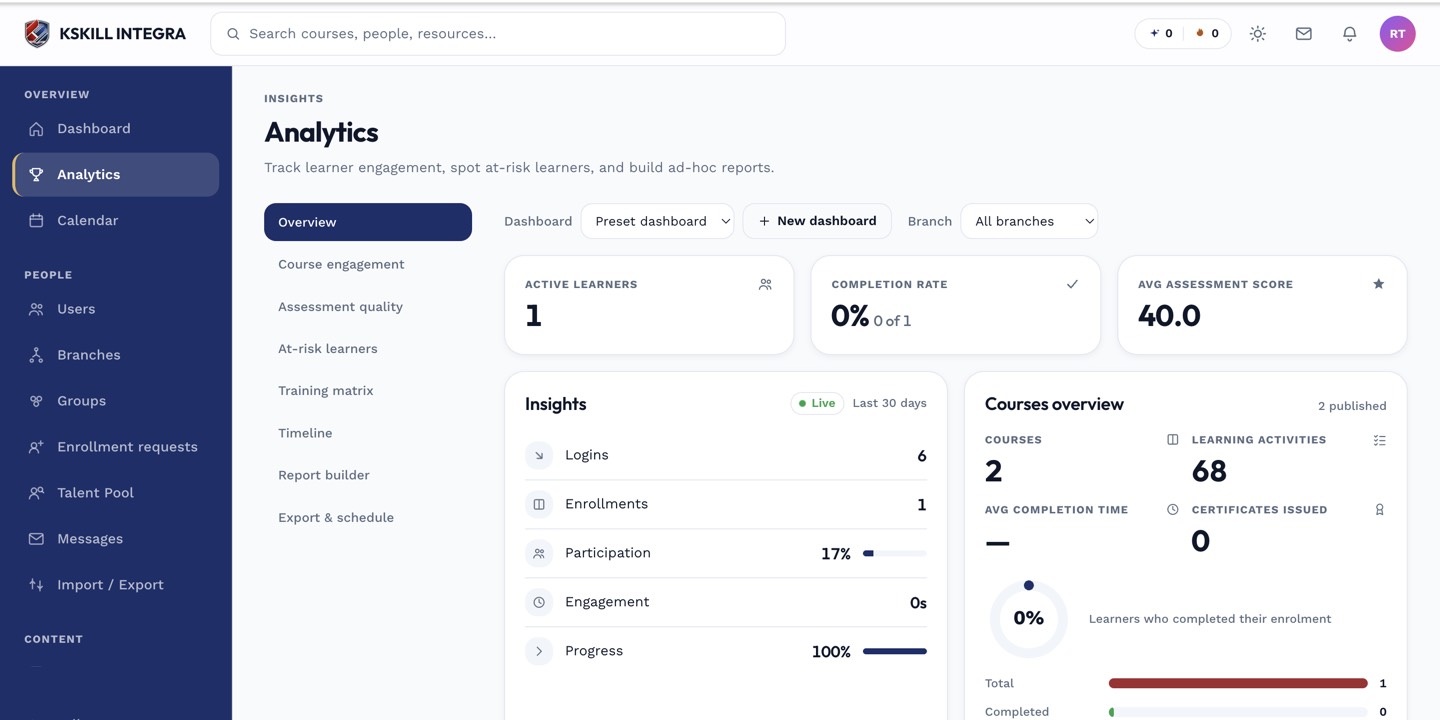
The Overview tab is the one everyone lives in — the deeper tabs answer sharper questions.
Notes
- Every screen has a small ? icon in the top right that opens the relevant KB article in a slide-over.
- Keep your first course in Draft until you have added at least one lesson and one test.